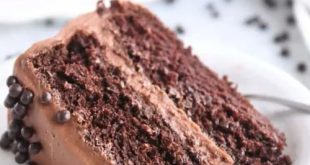
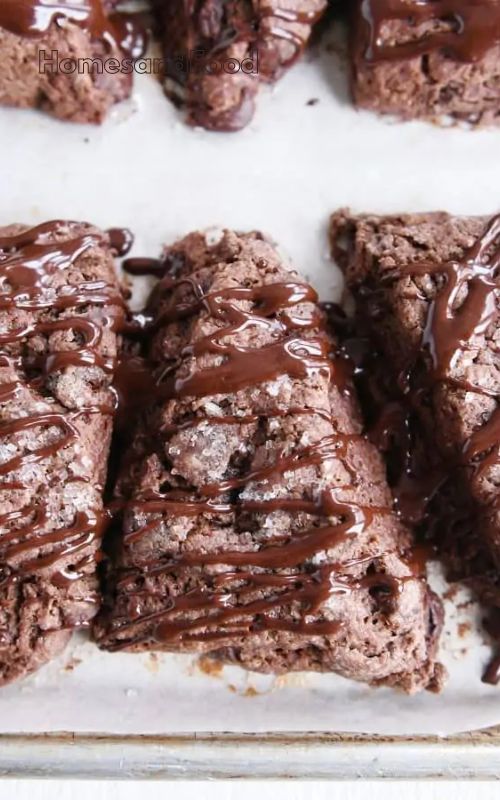
These triple chocolate cupcakes are amazing, with intense chocolate flavor and are flaky and tender. Plus, they are super easy to make. And the chocolate drizzle is amazing.
The triple chocolate cupcakes took a long time to arrive and were worth the wait.
Taking notes from this tried-and-true cookie recipe, it took some (okay, a lot) of testing to get it perfect. No one here was too sad to eat another experimental batch of pure, decadent chocolate heaven.
If homemade cookies sound intimidating, let me assure you with all the confidence of my lazy soul: They’re easy. Really easy.
And they’re perfect for all the chocolate lovers in your life. Seriously, why don’t we all make cookies more often?
Cakes vs. Cupcakes
I grew up thinking a cake was a flatbread dough that was fried in oil and then dipped in butter and honey (or cinnamon and sugar).
I didn’t know about fancy baked cakes until I was 20.
I’m pretty sure that, out of my ignorance, I argued with at least 3 of my college roommates that day about what constituted a “real” cake. Spoiler alert: These girls also regularly wore pants and high heels, grew up on the East Coast, and majored in things like art theory, so it’s no surprise that they won the argument and probably spent a lot of time looking at hillbilly cake theories.
While I was stubborn (and a little scared) at first, I’ve since fallen in love with the simple baked cake.
Butter Cutter
These chocolate chip cookies are incredibly easy. They’re one-pot wonders that are quick to make.
After mixing the dry ingredients, you need to cut in the butter.
This is usually a process that I hate. But here are two great tricks:
- Use a food processor (makes it super fast) or
- Take a grater and grate the cold butter into the large holes (if you work quickly, the butter won’t melt on your fingers).
The butter grating trick is my favorite. It’s quick and easy. Of course, you can also use a classic pastry blender or butter knives. You just want the butter in small, pea-sized pieces.
How to Mix Cake Dough
After the butter pieces are coated in the dry ingredients, add the chocolate chips (dark! so good!) and add the buttermilk and vanilla.
Begin mixing the dough with a rubber spatula until it comes together in shaggy pieces. Don’t over mix! It should take less than a minute to mix.
If the cake batter is mixed too much or too vigorously, the cake will be tough and dry.
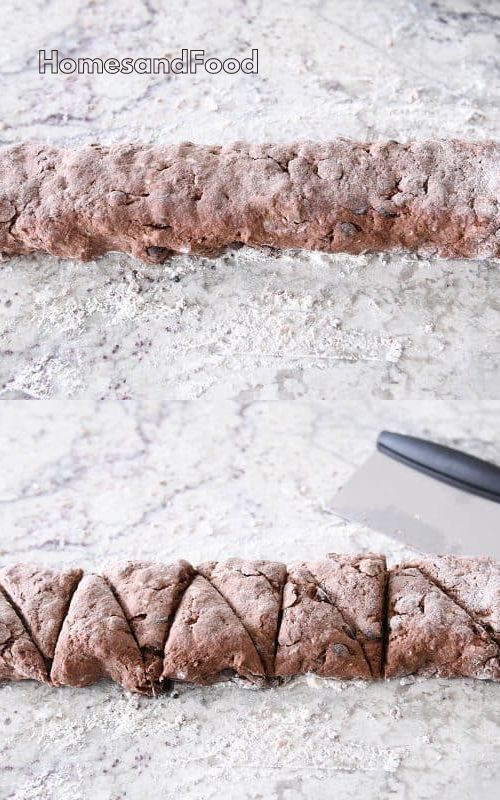
When the dough looks lumpy with a few dry spots, turn it out onto a lightly floured surface and roll it out into a long rectangle.
Using a sharp knife or a long knife (my favorite kitchen tool) cut it into 12 to 14 triangles. There’s no real magic number.
Cut them small. Cut them really big. It’s your choice. Follow your heart.
Don’t overcook them
Place the cookies on a baking sheet lined with parchment paper.
Brush them with butter and sprinkle them with sugar.
– Coarse sugar if you have it. It adds a nice sweetness and crunch to the top of the cookies.
Then bake them until done. If you’re not sure about doneness, choose a slightly lower baking temperature. If you bake them too long, they’ll dry out.
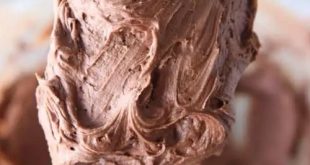
Glaze
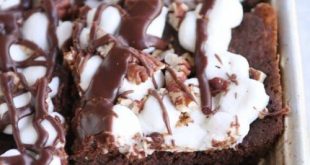
When the cakes have cooled to room temperature or are slightly warm, drizzle them with the delicious chocolate glaze.
I use the old trick of whipping the cream with a whisk. But you can get even fancier and pour the frosting into a piping bag, cut off the corner and start making cake art.
Cakes Tilt
If your cakes are tilting or “warping” while baking, don’t worry. It can be caused by a number of different things, such as the batter, how you measure your dry and wet ingredients, etc.
This cake recipe and the one I got from it have a slightly higher butter to flour ratio because I like my cakes very flaky and soft and tender.
Because of this, they may warp or tilt a little while baking, but I find that’s a small price to pay for a perfect cake.
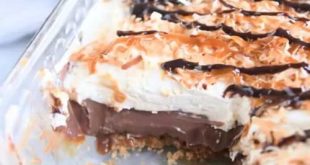
These triple chocolate muffins are divine.
My favorite way to eat them is to pop one (or more…) in the microwave and heat them for just 15 or 20 seconds. Just enough to give the frosting and chocolate chips a sensual, melty feel that is irresistible.
By doing this, even two-day-old muffins taste as fresh as the day they were born.
You’ll either love me or hate me for that information.
Triple Chocolate Scones
Makes: 12 Scones
Preparation time: 40 minutes
Cooking time: 15 minutes
Total time: 55 minutes
Ingredients
Cake:
- 3 cups (426 g) all-purpose flour
- ½ cup (43 g) unsweetened natural cocoa powder (see note)
- ¾ cup (159 g) granulated sugar
- 2 teaspoons baking powder
- ½ teaspoon baking soda
- ½ teaspoon salt
- ¾ cup (170 g) cold, salted butter
- 1 cup (170 g) semisweet or dark chocolate chips, regular or mini
- 1¼ cups milk (see note)
- 1 teaspoon vanilla extract
- 2 tablespoons (28 g) melted butter
- Coarse sugar for sprinkling (see note)
Glaze:
- ¼ cup (21 g) cocoa powder
- ¾ cup (86 g) powdered sugar
- 2-3 tablespoons milk or cream
Instructions
- Preheat oven to 200°C. Line a baking sheet with parchment paper and set aside.
- To make the scones: In a large bowl, combine the flour, cocoa powder, sugar, baking powder, baking soda and salt. Using the large holes of a grater, grate the butter into the dry ingredients. Mix until the butter pieces are evenly coated in the dry ingredients.
- (An alternative to grating is to cut the butter into pieces and add them to the dry ingredients, then cut with a pastry blender or butter knives until the butter is in pea-sized pieces. You can also mix the dough in the bowl of a food processor.)
- Add the chocolate chips. Mix to combine. Add the buttermilk and vanilla extract.
- Mix with a rubber spatula until the dough begins to come together. Don’t over mix! It’s okay if there are a few dry spots left. To test, press a handful of dough together. If it clumps together, it’s ready. If it collapses, add a few tablespoons more buttermilk.
- Turn the dough onto a lightly floured surface and shape into a long rectangle about 15 x 3 inches. Cut into 10 or 12 triangles.
- Place on baking sheet about 1/2 inch apart. Brush with melted butter and sprinkle with sugar.
- Bake for 12 to 15 minutes until firm but no longer doughy (if you’re not sure, make the mistake of baking slightly less).
- Let the cakes cool to room temperature or slightly warm.
- To make the glaze: Whisk together the cocoa powder and powdered sugar. Add the milk or cream and beat until thick but pourable, thinning with more milk if necessary.
- Dust the cakes with the glaze. Serve the cakes at room temperature or slightly warm.
Note:
Cocoa Powder – I think this would also be great with Dutch-processed cocoa. I use either all-natural cocoa powder (like Hershey’s) or half natural cocoa and half Dutch-processed cocoa (like Hershey’s or My Own Dark Droste).
Buttermilk – I’ve found that store-bought buttermilk works better than homemade buttermilk (milk + lemon juice) because it’s thicker. If you want a homemade option, I suggest mixing half sour cream and half milk. You can also try using cream instead of buttermilk.
Sugar: Coarse granulated sugar or unrefined turbinado sugar is delicious; if you don’t have any, regular granulated sugar works.