Chocolate lava cakes have never been easier! The simple batter for these cakes can be made ahead of time to bake whenever the craving strikes.
You won’t believe how easy it is to make chocolate lava cakes at home!
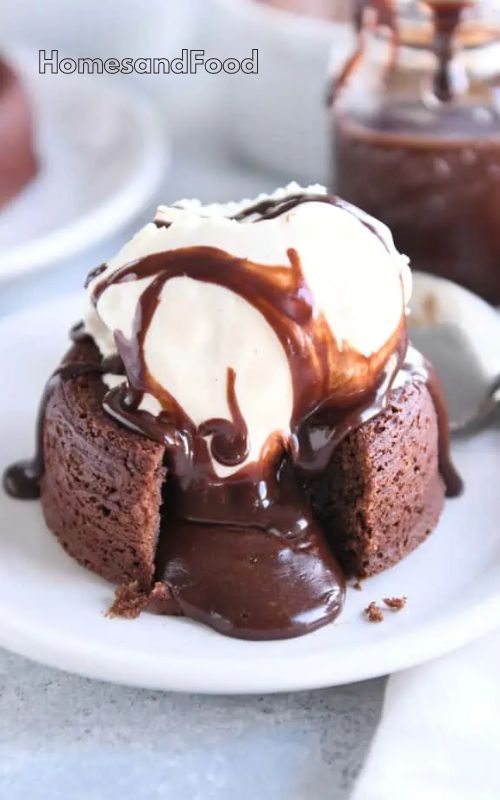
The combination of a light-as-air chocolate cake and delicious hot chocolate oozing from within is what dreams are made of (at least mine are).
Molten Lava Cake Mix
This dough is super simple and can be made without a mixer, but it does involve a few basic steps:
- Be careful beating the eggs until they are very thick, creamy, foamy and light in color! This helps make the chocolate dough light and fluffy.
- For the melted chocolate, use chocolate that has a great taste and melts well. I always use Ghirardelli dark chocolate chips in this recipe. They are perfect even for those who prefer a touch of semi-sweet chocolate (they don’t make the lava cakes too dark and rich). Not all of the chocolate chips melt either. I recommend using Ghirardelli or Guittard chocolate chips to melt with the butter in this recipe.
- After adding the flour, do not over mix. Just stir the dough a few times quickly until the flour is well combined.
The chocolate batter will be luscious and medium-thick but still pourable.
Small air bubbles throughout are fine!
Ideal Pan Sizes to Use
I make my lava cakes in my 8-ounce pan {affiliate link}.
You can also use my 6-ounce pan {affiliate link} (if so, you’ll likely get eight lava cakes out of a batch instead of six).
And…perhaps the best-kept secret is that the super-easy and affordable Pyrex glass flan molds {affiliate link} also work great for these cakes. My Aunt Marilyn (the creator of this recipe) mostly uses them.
I’ve also made my lava cakes in a standard muffin pan (I only filled 10, not all 12). The baking time is a few minutes shorter if you use a muffin pan, and it’s a little trickier to unmold and make them look pretty, but it definitely works in a pinch!
How to Grease the Pans
These molten chocolate lava cakes rely on a well-greased pan so they release easily for glazing and serving.
Yes, you can eat them straight from the pan, but it’s much more fun and traditional to place them on a plate to serve that way.
How to make them: Generously grease or rub butter on the bottom and sides of each pan, paying special attention to any crevices, especially where the sides and bottom meet. Then sprinkle evenly with cocoa powder and tap off any excess. This seems to work perfectly!
Fill each pan about 2/3 full with batter.
Bake until the edges and top are set, but there is still a little wobble in the middle.
How to Defrost Lava Cakes
When you remove them from the oven, let them rest for two or three minutes before loosening the edges with a thin knife.
*They can be left for longer, but keep in mind that if you do, they may be harder to remove cleanly, and as they cool in the hot pan, the melted center will set a little more and will no longer resemble lava.
Place a serving plate on top of the pan and tilt it so that it is on the counter. Gently tap the plate and pan until the cake slides out.
Use a cup holder to carefully lift the hot pan off the cake.
Favorite Dessert
Molten Chocolate Lava Cakes are so easy to make at home and are one of my all-time favorite desserts.
We serve them with ice cream and sometimes hot chocolate sauce, but they are also delicious on their own. With the perfect chocolate flavor, rich and delicious, it’s almost unbelievable.
Many of you have also fallen in love with homemade lava cakes!
My Favorite Molten Chocolate Cake
Makes: 6 cakes
Prep time: 20 minutes
Cook time: 13 minutes
Total time: 33 minutes
Ingredients
- 1 cup (170 g) semisweet or dark chocolate, chopped (see note)
- 10 tablespoons salted butter
- A pinch of salt, about 1/8 teaspoon; use more if using unsalted butter
- ½ teaspoon vanilla extract
- 3 large eggs
- 3 large egg yolks
- ½ cup (171 g) powdered sugar
- ½ cup (71 g) all-purpose flour
Instructions
- Preheat oven to 375-400 degrees F (see note!).
- Brush or spread a thin layer of butter evenly over the bottom and sides of six 6- or 8-ounce baking pans, paying special attention to the crevices, especially where the sides and bottom meet. Sprinkle with cocoa powder to coat evenly and then shake off excess.
- In a medium bowl, add chocolate and butter and melt in 1-minute increments in the microwave, stirring between each, until melted and smooth (do not overheat). This can also be done in a saucepan on the stove.
- Remove from heat, add salt and vanilla. Allow mixture to cool to room temperature (it should be slightly warm but not hot).
- In a large bowl with a handheld electric mixer or in the bowl of a stand mixer fitted with the paddle attachment, beat together the eggs and egg yolks until thick and light in color, 2-3 minutes (do not skip this step!)
- Add powdered sugar and mix until combined. Add the melted and cooled chocolate mixture and flour and mix with a spoon or spatula until combined and no streaks remain (don’t overmix).
- Divide the batter evenly between the ramekins and place on a large baking sheet, leaving at least 2 inches between each ramekin.
- Bake for 12 to 13 minutes until the edges are set and the cakes are soft in the center. Timing is really important here and a lot will depend on whether your oven is hot or cold. You want the ramekins to bake long enough to form a crust around the melted filling without baking them all the way through.
- Remove from the oven and let sit for 2 to 3 minutes. Run a small knife or metal spatula around the edges to loosen them. Place an inverted plate over the pan, and holding both the plate and pan, carefully flip them over so that the cake falls onto the plate (press very gently on the bottom of the pan if the cake doesn’t come out right away).
- Dust the cakes with powdered sugar or serve with whipped cream, strawberries or ice cream and hot fudge sauce (or a combination of all).
Note
Temperature: The baking temperature in the original recipe was 425 degrees. Every oven varies on the specific temperature, but I found it to be too high in my current oven, so I usually bake at 375 or 400 degrees Fahrenheit now. If your oven bakes on the warm side, bake the cakes at 375 degrees Fahrenheit.
Chocolate: I always use Ghirardelli dark chocolate chips in this recipe. Not all chocolate chips melt well; I recommend Ghirardelli or Guittard chocolate chips to melt with the butter.
Grease the pan: Using finely ground cooking spray (like Baker’s Joy) works great, but it may leave a little white or yellow residue on the outside edges of the cake (no big deal). I usually grease the pans well with butter and then dust them with cocoa powder so they get evenly dusted and any excess is removed.
Do Ahead: The cake batter can be prepared and spread into the pans a day or two ahead of time. Cover the pans with plastic wrap and refrigerate. Bake the muffins as directed (remove the plastic wrap, of course), adding an extra 30 to 60 seconds to the baking time to account for the cold batter.